


You can find loft and condo painters in Liberty Village through Home Painters Pro. My crew and I have painted hard lofts, townhomes, and condos across this neighbourhood for more than 20 years, and we handle the full building coordination along with the exposed-ceiling and high-wall loft work most painters avoid. Condo and loft interiors here run about $1.80 to $2.80 per square foot, plus HST.
I'm Chad, the owner. My crews are WSIB-covered, and I send you a $2 million liability certificate before any work starts. We hold a 5 out of 5 Google rating, and every job carries a written, tiered warranty: lifetime on interior work, three years on exterior, and five years on cabinets.
Liberty Village went from an industrial district to one of Toronto's most distinct neighbourhoods in about 15 years. We've been painting here since 2005, back when most of the loft conversions were just getting started. I've watched the area change, and we've painted hundreds of the spaces that define it today.
What Makes Liberty Village Homes Different
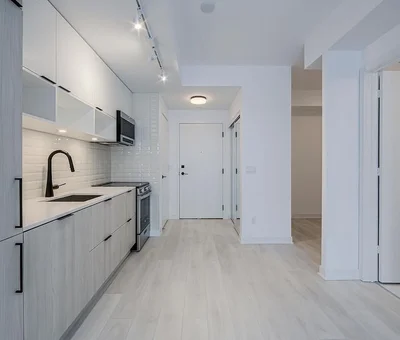
The architecture here doesn't follow a single pattern. You've got converted warehouses with 14-foot ceilings and exposed brick, modern townhome developments built around courtyards, industrial-style lofts where ductwork and concrete are part of the design, and sleek condos with floor-to-ceiling windows. Each type of space has its own painting challenges.
High ceilings change everything. The equipment, the time, the way paint dries at height, it all shifts. Exposed brick needs the right primer and a breathable masonry paint, or you trap moisture and create problems down the road. Open-concept layouts with no natural wall breaks mean colour choices matter more, because a bad call follows you from room to room.
We've handled all of it in this neighbourhood, repeatedly. That familiarity is worth something when you're planning a project.
A Liberty Village Hard Loft I Still Think About
A couple of winters ago I quoted a hard loft on a quiet street off East Liberty. Exposed concrete ceiling, raw ductwork running the length of the main room, and a two-storey feature wall that was brick on the bottom half and fresh drywall on the top half. The owner wanted a deep charcoal on that wall and warm white everywhere else. Simple on paper. The real job was reaching the top safely and keeping the lines crisp where the wall met everything it wasn't supposed to touch.
The brick-to-drywall seam was the first puzzle. Brick drinks paint and drywall doesn't, so the same colour reads slightly different across that line unless you prime the brick properly and feather the cut. We sealed the brick with a breathable masonry primer, let it cure, then cut the charcoal in by hand where the two surfaces met. No tape survives a rough brick edge, so that line gets done by eye and a steady wrist.
Then there was the height. That wall ran close to 18 feet, with ductwork and a sprinkler head sitting right in the path of the roller. We built a proper rolling tower instead of stretching off a ladder, because nobody should be reaching sideways at that height with a loaded roller. We masked every duct, conduit run, and the sprinkler head so the exposed services stayed clean and the charcoal stopped exactly where the design wanted it. Two coats, crisp lines, and the concrete ceiling stayed untouched. That loft is the kind of space that reminds you why access planning matters more than paint choice.
The other thing that loft taught me was patience with the deep base. Charcoal is a saturated colour, so it gets mixed in a deep base that carries less white tint and hides poorly over one pass. Anyone who tells you a single coat covers a wall like that is selling you a callback. We laid the first coat, let it dry overnight while the building air handled the low odour, then came back and rolled a second full coat the next morning. The owner kept living in the unit the whole time. We tarped the kitchen, kept a clear path to the door, and folded the rolling tower against the brick each evening so the space stayed usable. By the time we pulled the masking off the ductwork, the only thing that had changed was the wall.
Interior Painting for Liberty Village Lofts and Condos
Liberty Village interiors aren't cookie-cutter, and they shouldn't be painted that way.
We start every project with a proper walkthrough. I'll look at your ceiling height, wall conditions, existing finishes, and natural light before recommending anything. A north-facing loft with 12-foot ceilings needs a different colour strategy than a south-facing condo with a wall of windows.
For lofts with high ceilings, we bring proper scaffolding and work platforms. Not just tall ladders. The finish at 14 feet needs to be as clean as the finish at eye level. For exposed brick and concrete surfaces, we use products designed for those materials. Standard wall paint won't bond properly to concrete, and cheap paint on brick traps moisture in a way that causes real damage over time.
In open-concept spaces, we help you think through colour flow. You want zones and personality without closing off the space. It's one of the more interesting parts of the job, honestly.
Interior painting in Liberty Village starts around $3.50/sq ft for standard spaces. Lofts with high ceilings typically run $4.00 to $5.50/sq ft depending on access and prep, plus HST.
Most jobs move fast. A one-bedroom condo or loft takes one to two days, and a two-bedroom takes two to three days. Condo and loft interiors in Liberty Village run about $1.80 to $2.80 per square foot of floor area, plus HST, which is a useful planning number before we measure walls and ceilings. Where you land in that range comes down to access and prep. A flat-ceiling one-bed with painted walls already in decent shape sits near the bottom. A hard loft with 14-foot walls, exposed brick, and a feature wall in a deep colour pushes toward the top because of the staging, the masonry primer, and the second full coat those colours demand.
You don't need to move out while we work, and that is one of the things owners are most relieved to hear. We set up in the morning, protect your floors and furniture, and keep the space livable each evening. For a one-bed that often means painting the main room and bedroom on day one and finishing trim, touch-ups, and the final review on day two. You sleep in your own bed the whole time. We just ask that you clear small items off shelves and pull anything fragile away from the work walls before we arrive, which keeps the day moving and keeps your things safe.
Learn more about our interior painting services | Browse our condo painting service | What does it cost to paint a condo in Toronto?
If you want to read up before we visit, our guide on how to prepare a condo for painting and the rundown of condo painting mistakes to avoid cover most of what owners ask me on the first walkthrough.
Exterior Painting and Siding for Townhomes
Liberty Village townhome exteriors take a beating. Rain, snow, UV exposure, and road salt all work against your paint job year after year. We use premium exterior products from Benjamin Moore that hold up for 8 to 12 years in these conditions.
Whether your townhome has vinyl siding, Hardie board, wood trim, or a combination, the prep process is the same: power wash, scrape, prime bare spots, caulk gaps, then two full coats. Skipping any of those steps shortens the life of the job significantly.
We also handle colour selection for townhome exteriors, including navigating HOA or condo board requirements if your development has them. This is routine for us in Liberty Village.
Exterior painting starts at $4.50/sq ft. Siding painting runs $4.50 to $6.00/sq ft depending on material and condition, plus HST.
Explore our exterior painting services | Siding painting details
Exterior Brick Painting and Staining
Exposed exterior brick is part of Liberty Village's identity. Whether you want to freshen up faded brick, change the colour entirely, or apply a protective stain, we've done all of it in this neighbourhood.
The key with brick is using breathable masonry paint or stain that lets moisture escape. Toronto's freeze-thaw cycles are hard on masonry. If moisture gets trapped under a non-breathable paint film, the brick spalls and crumbles. We use the right products every time.
We can do full brick painting for a complete colour change, brick staining for a more natural look that penetrates rather than sitting on top, or limewash finishes that let the texture show through. Each gives a different result and suits a different kind of space.
Brick painting runs $5.00 to $7.00/sq ft depending on condition and how much prep is needed, plus HST.
See our brick painting and staining services
Spray Painting for Large Surfaces
For large exterior surfaces like siding, fences, and garage doors, spray painting delivers a smooth, even finish that brushes and rollers can't match. It's also faster, which means less time around your property and lower labour costs.
We use professional airless spray systems with careful masking. Windows, landscaping, adjacent surfaces, and neighbouring properties all get protected before we start. Spray painting is popular with Liberty Village townhome owners who want a clean, modern look on their exteriors.
Starting at $4.00/sq ft for exterior spray applications.
Learn about our spray painting services
Accent Walls and Feature Finishes
In open-concept lofts and condos, a single well-placed accent wall can anchor a room and give it a clear focal point. It's one of the most cost-effective changes you can make to a space. We do simple colour pops as well as more involved finishes like geometric patterns, colour blocking, and textured applications.
Starting at $250 per wall.
Explore accent wall ideas | How to choose paint colours
Tips and Tricks for Painting a Liberty Village Loft
After 20 years in these buildings, a few habits save me trouble on almost every Liberty Village job. Here is what actually matters.
Cut your lines by hand where drywall meets concrete or brick. Painter's tape pulls clean off smooth drywall, but it never seals against rough concrete or exposed brick, so paint bleeds under it and the line looks fuzzy. On those seams I prime the masonry first, then cut the edge freehand with a quality angled brush. It is slower, but it is the only way to get a sharp line on a textured surface.
Plan your access before you plan your colour. Loft walls run tall, and reaching the top with a roller off a leaning ladder is how people get hurt and how lines go crooked. A rolling tower or a proper work platform keeps you square to the wall and keeps both coats even from floor to ceiling. If your concrete ceiling sits above ductwork, mask the services before the first drop of paint lands.
Use low-odour, low-VOC paint when the air is shared. Many Liberty Village lofts sit on shared HVAC or have open stairwells to a neighbour, so paint smell travels. Low-VOC interior products keep the space breathable while you keep living there, and they cure faster in a closed-up condo. Our note on paint finishes explained covers which sheens hold up best in high-traffic loft rooms.
Book the service elevator early. This is the single most common scheduling delay I see. Buildings here often have one freight elevator and a short list of permitted work hours, so reserve your slot a week or two ahead. Lock the date before you lock the crew.
Nearby Areas We Serve
We're in this part of the city constantly. If you're in a neighbouring area, chances are we're already nearby.
- Downtown Toronto: condos, lofts, and heritage buildings
- Fort York: Bathurst Quay high-rises and waterfront condos
- Harbourfront: Queens Quay waterfront condos
- Old Toronto: heritage Victorians and condos
How We Work
Every Liberty Village project starts with an on-site visit. I come to your space, look at the actual conditions, and give you a quote based on what's really there. No estimates over the phone for jobs I haven't seen.
If your building has condo board requirements, elevator bookings, or loading dock restrictions, we handle all of that. You don't need to manage the logistics. We've worked in most Liberty Village buildings and we know the protocols.
Here's the building reality most owners don't expect. Many Liberty Village condos charge a move or work permit fee of roughly $75 to $200, and an elevator booking usually runs $150 to $350. Most buildings also limit work to weekday hours, often 9 a.m. to 5 p.m. We book the elevator, file the paperwork, and schedule our crew around those windows so you never have to chase the property manager.
I review every project before it's called done. That's not a slogan. It means someone who cares about the outcome looks at the work before we pack up.
What to look for when hiring a Liberty Village painter
Insist on an in-person quote, not a price guessed over a phone number. A painter who knows these buildings will confirm building access and your insurance requirements before quoting, because that affects the schedule and the cost. Ask for WSIB coverage and a current certificate of insurance in writing, and make sure your warranty is written down, not promised verbally.
Customer Testimonial
"Hiring Home Painters Pro to paint my condo couldn't have been simpler and the results were excellent. Thanks again!" Chris Spyropoulos
Pricing
Interior painting in Liberty Village starts at $3.50/sq ft for standard rooms and runs $4.00 to $5.50/sq ft for lofts with high ceilings or exposed brick. Exterior painting starts at $4.50/sq ft. Siding runs $4.50 to $6.00/sq ft and brick painting $5.00 to $7.00/sq ft. Accent walls start at $250. All prices are plus HST. These are honest ranges, and your actual quote will reflect what your specific space needs.
Call me directly at (416) 875-8706 or request your free quote. If I don't pick up right away, I'll get back to you as soon as I can.
Serving all of Liberty Village: East Liberty, West Liberty, King West Village, Liberty Market, and all surrounding loft conversions and townhome communities.
Frequently Asked Questions
Interior painting in Liberty Village starts at **$3.50/sq ft** for standard rooms. Lofts with high ceilings or exposed brick typically run **$4.00 to $5.50/sq ft** because of the extra prep and specialized equipment required. We provide a detailed, no-obligation quote after seeing your space, plus HST.
Exterior painting for Liberty Village townhomes starts at **$4.50/sq ft**. Brick painting or staining runs **$5.00 to $7.00/sq ft** depending on condition and prep work. Siding painting typically costs **$4.50 to $6.00/sq ft**, plus HST.
Yes. We work with condo boards and property managers regularly across Liberty Village. We handle elevator bookings, loading dock scheduling, and any required documentation. We carry full insurance and WSIB coverage.
Absolutely. We use specialized primers and breathable masonry paints designed for interior brick. We can also do limewash or German schmear finishes if you want to keep some of that industrial character showing through.
A standard Liberty Village condo (600 to 900 sq ft) takes 2 to 3 days. Larger lofts with high ceilings and exposed brick can take 3 to 5 days. We work efficiently and keep disruption to a minimum. You do not need to move out.
Yes. Spray painting is ideal for Liberty Village townhome exteriors, siding, and large surfaces. It provides a smooth, even finish and is faster than brushing or rolling. We mask and protect all surrounding areas thoroughly.
Yes. We provide free, no-obligation in-home estimates for all Liberty Village projects. I'll personally walk through your space, discuss your goals, and give you an honest price on the spot. [Request your free quote here](/quote/).