


Quick Answer
Wall prep determines paint job longevity more than paint quality or colour. Fill holes (spackling for small, joint compound for large), sand smooth with 120-150 grit, vacuum and wipe down, prime problem areas (stains, patches, dark to light), and confirm nothing is loose or peeling. Professional painters spend 50 to 70% of project time on prep. Skipping steps saves a few hours and costs you a paint job that fails in 18 months.
I've been painting Toronto homes for 20 years. The single question I get asked most isn't about colour or budget. It's this: "Do I really have to do all this prep work?"
Yes. You do.
And here's why: the difference between a paint job that looks great for 8 years and one that starts peeling after 18 months is almost entirely prep. Paint quality matters. Technique matters. But prep is the foundation everything else is built on. A cheap paint job with perfect prep beats premium paint with lazy prep, every single time.
This is the actual checklist we use on every Toronto interior painting project. Not the sanitized version you'll read elsewhere. This is what prevents callbacks and warranty claims.
What gets done and why
Before the step by step, here's the purpose of each phase.
Clearing and Cleaning clears dust, grease, and loose material so new paint bonds properly. Paint doesn't stick to dust. It sticks to clean wall surface.
Filling and Repair addresses holes, cracks, and damaged areas. Unfilled imperfections show right through fresh paint under any kind of side lighting. This is why TV rooms look worse than professional builds: nobody filled the holes.
Sanding creates a smooth surface for paint to adhere to. It also dullifies glossy finishes so new paint grips properly.
Priming seals stains, blocks dark colours, and creates a uniform base for finish paint. Sometimes you can skip it. Usually you shouldn't.
Final Cleaning removes all dust before paint goes on.
Each phase is non-negotiable if you want a result that lasts.
Wall prep checklist
Step 1: inspect the walls
Before you move anything, walk the room with good side lighting. Hang a work light low on one wall and look at the shadows. Every hole, crack, dent, and water stain jumps out. This inspection determines how much work you're actually doing.
Check for:
- Holes and nail pops
- Cracks (hairline vs. deep)
- Water stains or discolouration
- Loose or peeling paint
- Glossy finishes that won't accept new paint
- Texture or wallpaper
- Grease or smoke residue (especially in kitchens)
- Mould or moisture damage
In older Toronto homes, check ceiling-to-wall seams in bedrooms and living rooms. Plaster often cracks there.
Step 2: clear the room
Take off outlet covers, wall plates, curtain rods, and hooks. Mask around light fixtures and ceiling edges with painter's tape. Move furniture to the center of the room and cover it. Close the doors, open the windows, and set up your work light so you're not working in shadows.
Don't skip this. Working in the dark is how you miss patches that need attention.
Step 3: fill holes and damage
This phase separates DIY from professional. Most people either skip it entirely or do it wrong.
Nail holes and small dings (under a quarter inch): Use paintable spackling. Apply with a putty knife, overfill slightly, let it dry (usually 30 minutes to 2 hours depending on product), sand smooth with 150 grit, wipe, and you're done. One coat usually handles this.
Larger holes (quarter inch to half inch): Same process but use two thin coats instead of one thick coat. Thick spackling shrinks and cracks. Thin coats dry more evenly.
Large holes, drywall damage, or gouges (half inch and larger): Use joint compound (drywall mud) or a patching product made for large holes. For holes bigger than an inch, you might need a backing patch. Cut out the damaged area to a clean edge, install a backing patch or screen, apply joint compound in two or three thin coats, sand smooth, and prime.
For cracks running along seams or corners, don't just spackling over them. They'll crack again. Use paintable caulk or flexible spackling. For deeper cracks (wider than a quarter inch), clean out loose material, fill with flexible spackling, sand smooth, and prime.
In old plaster homes, use a plaster patching product, not drywall mud. Plaster and drywall behave differently. Plaster patches stick to plaster better than drywall compound does.
Pro tip: Spackling shrinks as it dries. For anything bigger than a pinhole, overfill by about 10% so it's not sunken when it's dry.
Step 4: sand everything
Most people skip or minimize this. Don't.
Sanding does three things: smooths spackling and patches, dulls glossy finishes so new paint grips, and removes loose paint or primer.
For most walls: Use 120 to 150 grit sandpaper by hand. Power sanders are faster but you risk oversanding, creating divots, or clogging the sandpaper with old paint and dust. Hand sanding with a sanding block gives you better control.
For glossy or semi-gloss finishes: Use 150 to 180 grit. You're breaking the shine, not removing the paint. Sand until the surface is dull.
For heavily textured walls: Use 80 to 120 grit and be prepared for this to take a while. Or just accept that texture stays and work around it.
Sand in circular motions, don't bear down, and work in sections. The goal is smooth surface, not perfectly uniform. After sanding, the wall should look matte and feel slightly rough to your palm.
In older plaster homes, be gentler. Use a handheld block and hand sanding only. Aggressive power sanding can crack or damage plaster.
Step 5: vacuum and wipe down
This step gets skipped constantly. It shouldn't.
Vacuum the entire wall and baseboards with a brush attachment. Don't just sweep. Dust settles and becomes airborne during paint application.
After vacuuming, wipe the walls with a tack cloth (slightly tacky cloth that picks up dust) or a damp rag. Use water or a slightly damp sponge. Don't make the walls wet. Just dampen them enough to lift residual dust.
Let the walls dry fully before priming or painting. In humid conditions this takes longer.
If you skip this, you get paint that looks bumpy and textured instead of smooth. Dust particles trapped under wet paint is visible and permanent.
Step 6: caulk the gaps
After filling holes and spackling, look for cracks or gaps where walls meet trim, ceiling, or corners.
For cracks that are still visible, use paintable caulk. Smooth it with your finger or a caulk tool, let it dry, sand lightly if needed, and prime. Caulk is flexible enough to handle minor movement without cracking again.
For gaps between the wall and trim, use paintable caulk. It fills the gap and provides a finished look.
For larger cracks in plaster or concrete, fill with flexible spackling first, then caulk over if there's still a visible gap.
Step 7: prime where it matters
You don't always need to prime everything. But you always need to prime these situations:
- New drywall patches or repairs
- Stains (water marks, smoke, grease, or markers)
- Dark paint or wallpaper if you're going light
- Areas with bare drywall showing
- Glossy finishes that you've sanded
- Mould-affected areas (use mould-killing primer)
- Concrete or raw plaster
For everything else, if the walls are clean and in good shape, two coats of quality paint sometimes covers without primer. Sometimes.
Best practice: Prime first. It's $30 to $50 per gallon and saves you from three coats of paint. Over an average room, primer saves money and time.
Use a primer matched to your finish paint colour if possible. Tinted primer that matches your finish colour cuts the number of top coats needed.
For stains, water marks, or smoke damage, use a stain-blocking primer specifically designed for that (like Zinsser Bulls Eye 1-2-3). Regular primer doesn't block stains the way specialized stain blockers do.
What you actually need
Here's what you actually need (not everything the hardware store tries to sell you):
| Item | What We Use |
|---|---|
| Spackling/Joint Compound | DAP Fast 'N Final or Dap Pro or similar. We use fast-dry versions to keep projects moving. |
| Sandpaper | 120 grit (bulk of wall sanding), 150 grit (finishing), 180 grit (glossy finishes). Buy in bulk. You'll use more than you expect. |
| Sanding Block | Basic foam or rubber block, 4.5 x 9 inches. Keeps pressure even. |
| Primer | Benjamin Moore Primer Sealer Undercoater or Sherwin-Williams ProClassic for most situations. Stain-blocking primer for water marks or smoke. |
| Putty Knives | 2-inch for nail holes, 6-inch for larger patching. |
| Paintable Caulk | Paintable acrylic latex caulk for gaps and cracks. |
| Tack Cloth | Generic cotton tack cloth. Picks up dust way better than rags. |
| Work Light | Temporary work light on a stand or clamp. Non-negotiable. You cannot see imperfections in bad light. |
| Vacuum | Regular household vacuum with brush attachment. |
| Masking Tape | Quality painter's tape. Cheap tape bleeds paint underneath. |
| Drop Cloth | Canvas or plastic. Canvas is better because it doesn't slip around. |
Don't cheap out on sandpaper or primer. These are the items that directly affect how good the final result is. Paint is the visible part. These materials are the invisible foundation.
Different wall types
Toronto has a mix of home ages and construction types. Each needs slightly different prep.
Modern drywall
Most homes built after 1980 have drywall. It's straightforward:
- Fill holes with spackling
- Sand smooth
- Prime patches and new drywall
- Wipe dust
- Paint
Drywall is forgiving. It doesn't crack along seams as much as plaster. Fill, sand, prime, paint.
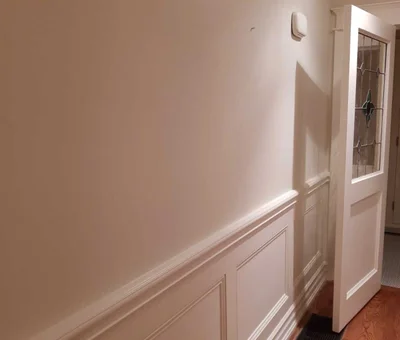
Plaster (Victorian, Edwardian, pre-1960 homes)
Plaster is common in Toronto's older neighborhoods: the Annex, Roncesvalles, Leslieville, and similar areas. Plaster behaves differently than drywall.
Plaster is harder, denser, and more brittle. It cracks in patterns different than drywall. It also needs different products.
Prep for plaster:
Check for loose plaster by tapping along walls. Hollow spots mean the plaster is separating from the lath underneath. This needs professional repair before painting.
For small cracks, use paintable caulk or a plaster-specific patching product. Don't use drywall joint compound. Plaster patches need plaster products to grip properly.
Sand lightly by hand. Power sanding on plaster kicks up massive dust clouds and risks damaging the wall. Use 120 grit and go easy.
Use a plaster-bonding primer before paint. Benjamin Moore Primer Sealer Undercoater works well.
Expect sanding to take longer. Old plaster is often uneven, and you can't sand it aggressively.
For plaster ceilings, the same rules apply but the work is physically harder. Consider whether this is a DIY job or a call-the-pro job.
Concrete (basements, garage walls)
Concrete is porous and alkaline. Paint doesn't stick to concrete well without proper prep.
Prep for concrete:
Check for moisture. If the wall weeps water or the concrete is damp, moisture is the problem. Fix that before painting or the paint peels regardless.
Clean the surface thoroughly. Concrete collects dust, efflorescence (white mineral deposits), and algae. Use a stiff brush and water to clean, or a pressure washer on low setting.
Let it dry fully. Concrete needs to be bone dry before priming. This can take 48 to 72 hours depending on humidity.
Use a concrete primer. Regular primers don't bond to concrete. Use Sherwin-Williams ProClassic Primer or Benjamin Moore Concrete and Masonry Primer.
Paint with concrete-rated paint (semi-gloss or satin, not flat, which shows every mark).
Basement painting is a separate project from interior house painting. It's slower and requires different products because of moisture concerns.
Special situations
Dark to light colour changes
Painting from dark to light requires more coverage. Dark paint shows through light paint until you have enough coats.
The standard approach: prime with tinted primer that matches or closely matches your finish colour. Then one or two coats of light paint.
This beats no primer and three coats of light paint. Primer blocks the dark underneath. Paint just covers.
If you can't find tinted primer that matches your light colour, use white primer. One white primer coat plus two light paint coats beats no primer and three light coats.
Wallpaper removal
Some people try to paint over wallpaper. This is a mistake.
Wallpaper doesn't accept paint the way walls do. Paint sits on top of the wallpaper surface (and the adhesive underneath), not bonding to the wall. Humidity, temperature changes, or minor wall movement, and the whole thing peels off in sheets.
Remove the wallpaper first. It's work (score it, spray with removal solution, scrape, wash the walls, let dry) but it's the only way to get a lasting paint job.
Score the wallpaper with a scoring tool to let removal solution penetrate. Spray the walls with removal solution (fabric softener and water works, or commercial removal solution). Let it soak for 15 to 20 minutes. Scrape off gently. Repeat as needed. Wash with clean water to remove residual adhesive and let dry.
Then prep and paint normally.
Glossy or semi-gloss finishes
Glossy paint doesn't bond well to new paint. The glossy surface is too smooth for good adhesion.
Sand it dull with 150 to 180 grit sandpaper. You're not removing the paint. You're breaking the gloss so new paint grips. Sand until it's matte, wipe with a tack cloth, and paint.
Skip sanding glossy walls and your new paint peels within months.
Common prep mistakes
I've seen these mistakes a hundred times. Each one results in a paint job that fails or looks bad.
Not filling holes. Unfilled nail holes show right through under side lighting. People see them and think the paint job is poor quality when the problem is the prep. Fill everything.
Sanding too aggressively. Power sanders in untrained hands create divots or oversanded spots. Hand sand most walls. Power sanders are for large flat spaces and professionals who know what they're doing.
Not vacuuming or wiping. Dust under paint creates a rough, bumpy texture that's permanent. Five minutes of vacuuming and wiping saves hours of frustration later.
Priming only patches, not surrounding areas. Patches prime to a different sheen than unprepared wall, so the sheen looks patchy. Prime the entire wall if you're priming at all.
Skipping primer on stains. Water marks, smoke, and grease show right through two coats of paint. Stain-blocking primer is not optional for these situations.
Painting over wallpaper. This always fails. Remove wallpaper first.
Painting semi-gloss walls without sanding. Glossy finishes require sanding to accept new paint. Sand, wipe, then paint.
Multiple thick coats of spackling instead of multiple thin coats. Thick coats shrink unevenly and crack. Two thin coats beat one thick coat every time.
When to call a pro
Not all wall prep is a DIY job.
Call a pro for:
- Extensive plaster repair or loose plaster (needs professional stabilization)
- Large drywall damage (anything bigger than 4 by 4 inches should probably be cut out and patched by someone experienced)
- Water damage or mould (needs identifying root cause and proper treatment)
- Popcorn ceiling removal (contains asbestos in older Toronto homes; testing and professional removal required)
- Lead paint testing or abatement (any Toronto home built before 1978; testing is required by law for renovation)
- More than 20 hours of prep (at that point, professional labour is often cheaper than your time)
- Concrete or garage prep (different process, different products, and moisture is tricky)
Professional wall prep typically runs cost to paint a house in Toronto at $200 to $600 in labour plus materials. Compare that to your hourly rate and the risk of mistakes, and professional is often the better choice.
We offer interior painting services across Toronto. We also handle the specialized work: drywall repair and painting, condo painting, and older home specialties.
Prep by room
Different rooms have different prep challenges.
Kitchen: Grease residue requires degreasing before sanding. Degreaser, cloth, dry, then proceed with normal prep. Adds 1 to 2 hours.
Bathroom: Moisture is the concern. Mould or water stains need stain-blocking primer. Otherwise normal prep. Adds 30 minutes if there are stains.
Bedrooms: Usually straightforward. Fill holes (kids' rooms have more), sand, prime patches, paint. Standard time.
Living room: Usually larger wall area. More holes and scuffs to fill proportional to square footage. Adds time but standard process.
Basement: Moisture check first. If moisture is present, fix that before painting or paint fails. If dry, standard drywall or concrete prep.
Stairwell: Difficult wall angles and height. Most of the time is getting to the work safely and accessing corners. Standard process, but expect 3 to 4 times longer per square foot than a flat wall.
Toronto-specific considerations
Toronto homes span 150+ years. This matters for prep.
Pre-1960 homes in Leslieville, Roncesvalles, the Annex: These are mostly plaster. Plaster prep is slower, requires different products, and risks damage if you're too aggressive. Expect 20 to 30% more time than you'd budget for modern drywall homes.
Victorian and Edwardian homes (all over Toronto): More trim, more corners, more architectural detail. More surfaces to fill and sand. Budget accordingly.
Condos in downtown Toronto: Often built in the 1960s-1980s. Drywall is common but quality varies. Some units have water damage or moisture issues. Inspect carefully before pricing.
Post-1995 suburban builds (North York, Scarborough, Mississauga, Markham, Vaughan): Newer drywall, fewer structural issues, more straightforward prep. Standard process applies.
Basement in older Toronto home: Low ceilings, potential moisture, old concrete. Prep is more involved than above-grade rooms.
How long does prep actually take
This is what homeowners underestimate most.
- Minimal prep (few holes, walls in good shape): 2 to 4 hours for a bedroom
- Moderate prep (20-30 holes, some cracks, light cleaning): 8 to 12 hours for a bedroom
- Extensive prep (damage, stains, glossy finish, degreasing): 15 to 24 hours for a bedroom
- Whole house interior, moderate prep: 40 to 60 hours
- Whole house interior, extensive prep: 80 to 120 hours
These are labour hours. If you're doing it yourself, double these estimates because you're working alone and learning as you go.
Professional painters work faster because they know the product timelines (spackling dry time, primer dry time) and work efficiently. They also have the right tools, which matters.
For a whole house job, prep takes 50 to 70% of total time. Painting takes 30 to 50%. That's normal.
Product guide
| Problem | Product | How Much | Cost |
|---|---|---|---|
| Small nail holes | Spackling (DAP Fast) | 1 quart | $6 |
| Larger holes/patches | Joint compound | 1 bucket (5 gal) | $8 |
| Cracks/gaps | Paintable caulk | 1 tube per 30 ft | $4 |
| Sandpaper 120 grit | 120 grit (50 sheet pack) | 1 pack | $15 |
| Sandpaper 150 grit | 150 grit (50 sheet pack) | 1 pack | $15 |
| Primer (standard) | Benjamin Moore Primer/Sherwin-Williams ProClassic | 1 gallon | $30 |
| Stain-blocking primer | Zinsser Bulls Eye 1-2-3 | 1 quart | $12 |
| Concrete primer | Sherwin-Williams Concrete Primer | 1 gallon | $35 |
| Putty knife (2 inch) | Basic putty knife | 1 | $3 |
| Putty knife (6 inch) | Basic putty knife | 1 | $5 |
| Sanding block | Foam block | 1 | $5 |
| Tack cloth | Cotton tack cloth | 1 | $4 |
| Work light | Clamp light | 1 | $20 |
Total cost for a bedroom-sized room: roughly $100 to $150 in materials. Labour is the big cost.
What professional prep includes
If you hire a painter for interior painting Toronto services, here's what professional prep includes:
- Complete inspection and photography of wall condition
- Furniture removal and covering
- All spackling and joint compound work, multiple coats if needed
- Sanding all walls and patches
- Vacuuming and wiping down entire space
- Caulking gaps and cracks
- Taping around trim, fixtures, and ceiling
- Primer application where needed
- Stain-blocking on water damage or marks
- Lead paint testing and abatement (if applicable in pre-1978 homes)
Professional prep adds time but eliminates surprises during painting. The paint goes on over a perfect surface, so coverage is consistent, and the finish lasts years longer.
The short version
Wall prep doesn't show up in before-and-after photos. But it's the difference between a paint job that fails in 18 months and one that holds for 8 years. We spend 50 to 70% of project time on it because it works.
If you're planning to paint your Toronto home, give prep the attention it deserves. Fill the holes. Sand the walls. Vacuum the dust. Use primer where it matters. It takes time, but the result is a paint job you won't regret.
For more on painting basics, see our guide to paint finishes and how they affect durability, or how to choose paint colours that actually work in your space.
Get a quote
If you've gotten this far and realized prep is more than you want to tackle, that's fair. Some people DIY it, some hire it out.
We handle wall prep and painting for Toronto houses, condos, and anything with specialized drywall repair.
Get your free 24-hour quote or call (416) 875-8706
We work across downtown Toronto, North York, Etobicoke, Scarborough, Mississauga, and the rest of the GTA. Questions? Check our FAQ or get in touch.
Frequently Asked Questions
Wall prep takes 50 to 70% of total project time. A bedroom with minimal prep takes 2 to 4 hours. A room with drywall holes, cracks, and sanding takes 8 to 12 hours. A whole house interior with moderate prep takes 20 to 40 hours before any paint touches the walls. Skipping steps doesn't save time; it just moves the problem into the paint application phase where it's harder to fix.
Primer over new drywall, patches, stains, and dark-to-light colour changes is mandatory. For walls in good shape getting repainted the same colour family, you can sometimes skip primer and use two coats of quality paint instead. But primer beats paint at sealing, blocking stains, and covering repairs. When in doubt, prime it. One coat of primer plus one coat of paint still beats no primer and three paint coats.
The paint will look dull, uneven, and textured. Dust particles create a rough surface that doesn't bond well with paint. The finish looks bumpy under light. After a few months, you get peeling and flaking where dust particles are trapped between the wall and paint. A quick vacuum and damp wipe takes five minutes and prevents six months of regret.
Spackling is for small holes under a quarter inch. It shrinks less and sands smoother. Joint compound (drywall mud) is for bigger holes and patches. For anything larger than a half inch, use spackling to fill, let it dry, sand smooth, apply a second coat if needed, sand again, and prime. Multiple thin coats beat one thick coat that cracks and shrinks.
Plaster is more fragile than drywall. Use 120 to 150 grit sandpaper instead of aggressive 80 grit. Sand by hand rather than power tools to avoid dust clouds and cracking. Check for water damage or loose plaster before sanding. Fill cracks with spackling or plaster patch (not drywall mud, which doesn't grip plaster well). Use a plaster-bonding primer before paint. Victorian and Edwardian homes across Toronto have plaster that deserves careful handling.
Glossy paint doesn't bond well with new paint. Sand it with 150 to 180 grit until the shine is gone and the surface is dull. You don't need to sand it completely smooth; you just need to break the gloss. Wipe with a tack cloth or damp rag to remove sanding dust. Prime with a bonding primer for best results. Skip this step and your new paint will peel within months.
Water stains show right through paint. Prime over the stain with stain-blocking primer (like Zinsser Bulls Eye 1-2-3) before painting. Smoke damage needs sealing primer too. For stubborn stains, two coats of primer plus one coat of paint works better than no primer and three paint coats. The primer actually seals and blocks; paint just covers.
Remove it. Painting over wallpaper is asking for peeling. The new paint doesn't bond to the wallpaper; it bonds to the adhesive underneath. Humidity, temperature changes, or any wall movement and the whole thing lifts off. Removal takes time (score, spray with removal solution, scrape, wash, let dry) but it is the only way to get a lasting finish.