


Key Takeaways
- Premature paint failure is a prep problem far more often than a paint problem. Ceilings are no exception.
- Use a dedicated flat ceiling paint like Benjamin Moore Waterborne Ceiling Paint (508), engineered for low spatter and dead-flat sheen to hide drywall flaws.
- Two coats minimum. No exceptions, even for paints labelled self-priming. Cut in twice and roll twice to prevent the picture-framing defect.
- Roll smooth ceilings, spray popcorn and stucco. Never use latex on raw popcorn, the moisture pulls texture off the drywall.
- DIY material runs $40 to $80 CAD per room; pro ceiling-only work runs $300 to $500 CAD per room plus HST based on our 2026 Toronto pricing.
- Toronto homes built before 1990 may have asbestos in popcorn texture, test before scraping or sanding.
I'm Chad. I've painted Toronto ceilings for 20 years. Bedrooms, bathrooms, condos, lofts with 14-foot peaks, basements where the ductwork is in your face the whole time. When homeowners ask me if they should DIY their own ceilings, my answer is yes, you can. YouTube just makes it look easier than it is.
The DIY jobs I get called in to fix usually share three problems. Lap marks running across the room like tire tracks. Dried drips welded onto the walls. And the homeowner who couldn't lift their arms above their head for two days after.
So this is the method we actually use on jobs. Not the sanitized version. I'll warn you about your back, about asbestos in older popcorn, and about the point in the day when you'll wish you'd just hired someone. For the prep-and-craft philosophy behind it, read our Toronto painter craft hub.
Why are ceilings harder to paint than walls?
Ceilings punish bad technique in a way walls don't. Gravity works against you, every imperfection catches the light, and almost every premature failure I get called back to trace to surface prep. On a ceiling those failures aren't hidden by furniture or shadows. They're staring down at you in full daylight.
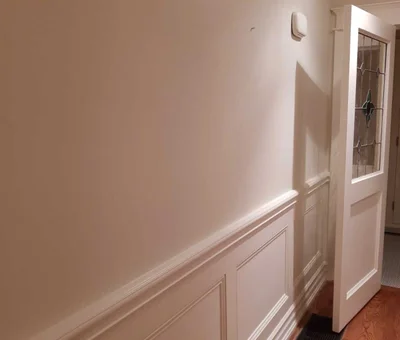
The principle every pro lives by: a ceiling shouldn't reflect any light. Any sheen turns every roller mark and drywall seam into a visible shadow. That's why dead-flat paint matters more on ceilings than it does on walls.
A few reasons ceilings are harder:
Light hits them differently. Walls are vertical and lit from the side, so roller marks fade into shadow. Ceilings are horizontal, lit from windows below, and any reflectivity throws a shadow off every imperfection.
Gravity is against you. Paint drips onto walls, onto floors, into your hair, into your eyes. A loaded roller above your head wants to come down on you, not stay up there.
Your body wasn't built for it. Four pounds of roller and pole overhead is brutal on the neck, shoulders, and lower back. Pros build up to it. DIYers don't.
What I see on call-backs: Roughly one in three DIY ceiling re-do calls comes from someone who painted on a hot summer day with the windows open. The paint set before they could keep a wet edge going. Lap marks everywhere. Pick a cool, overcast day if you have the choice.
For a deeper breakdown of pro pricing, see our Toronto condo ceiling cost guide.
Should you DIY or hire a pro? Decide before you spend a dollar
Do this math before you go to the paint store. A starter kit of ceiling paint, a 13mm roller and frame, an extension pole, drop cloths, painter's tape, a sash brush, spackling, and a tray runs $150 to $350 CAD in Toronto (current Home Depot, RONA, and Benjamin Moore retailer pricing, 2026). A pro can often do the same ceiling for not much more, and you skip the lost weekend.
The honest break-even, room by room (all prices CAD, HST extra):
| Project | DIY cost (supplies) | Pro cost (Toronto) | Time (DIY) | Verdict |
|---|---|---|---|---|
| Single bedroom ceiling, smooth, you own basic tools | $40-$80 | $300-$500 | 3-5 hrs | DIY usually wins |
| Single bedroom ceiling, smooth, starting from zero | $150-$350 | $300-$500 | 4-6 hrs | Tie, get a pro quote first |
| Whole condo, smooth ceilings | $200-$400 | $390-$585 (flat at $0.65/sq ft) | Full weekend | Tie, pro often cheaper once you factor your time |
| Whole condo, stucco/popcorn ceiling | Don't DIY | $900-$1,350 ($1.50/sq ft) | N/A | Hire a pro |
| Whole-home interior ceilings | $250-$500 | $1,000-$1,500 | 2 weekends | DIY saves ~$700 if you do it well; loses money if you don't |
| Bathroom ceiling (Aura Bath & Spa) | $120-$200 | $250-$400 | 3-4 hrs | DIY wins on cost only |
| Anything 10 ft+, water-stained, or pre-1990 popcorn | Don't DIY | Quote required | N/A | Hire a pro |
Pro pricing across Toronto sits at about $0.65 per sq ft for flat ceilings and $1.50 per sq ft for stucco based on our 2026 condo ceiling rates. HST is extra on every Ontario painting invoice. The part that surprises people: starting-from-zero DIY costs almost as much as hiring a pro for one room. Add the value of your weekend, the risk of a re-do (58% of DIYers spend more than planned because of project errors per Hippo Insurance, 2024), and the math often flips.
My honest advice: Get a free quote before you commit either way. If the pro number comes in close to your DIY budget, the call is easy. If it's well above and you've got a free weekend, DIY makes sense. Either way you're working with real numbers.
Get your free Toronto ceiling painting quote or call (416) 875-8706.
What do you actually need to paint a ceiling?
A typical Toronto bedroom ceiling takes about $40 to $80 CAD in material if you already own the tools, or $150 to $350 starting from zero (Toronto retailer pricing, 2026). Skip the cheap hardware-store kit. Bad rollers and trays are the second-fastest path to a botched ceiling, right after skipping prep.
Here's the gear list I'd hand a friend.
Paint and primer
- Dedicated flat ceiling paint.Benjamin Moore Waterborne Ceiling Paint (508) is what we reach for. It's a flat ultra-low-spatter formula built to dry faster than wall paint, hide drywall imperfections, and keep your face and floor cleaner. About $50 to $60 CAD per gallon plus HST in Toronto, covers 350 to 400 sq ft per gallon on smooth drywall (Benjamin Moore TDS, 2026).
- Why ceiling paint isn't the same as wall paint. Three reasons. Dead-flat sheen with no leveling agents that would add reflectivity. Spatter-resistant chemistry so it doesn't rain back down on you. Faster dry time so a wet edge stays manageable across a whole room. A premium wall paint thinned out is not the same product.
- Stain block reality. For water stains, smoke, and nicotine, use Zinsser BIN shellac primer (Rust-Oleum TDS, 2025). Shellac is the one chemistry that locks all three down permanently. For bare drywall, use Benjamin Moore Fresh Start 046 acrylic primer. Don't take the self-priming shortcut on raw drywall. The can might say you can; the ceiling will say otherwise in a month.
- Coverage math. One gallon covers roughly 350 to 400 sq ft on smooth drywall, 20% less on textured ceilings (Sherwin-Williams Paint Calculator, 2025).
Tools
- 9-inch roller frame with a 13mm or 15mm nap roller cover. Use 13mm for smooth drywall, 15mm for any texture or older Toronto plaster.
- 4 to 6 foot extension pole. Non-negotiable. The single biggest difference between a sore weekend and a ruined back.
- 2.5-inch angled sash brush for cutting in.
- Roller tray with disposable liners, or a 5-gallon bucket with a grid for bigger jobs.
- For unpainted stucco or popcorn ceilings only: a slotted foam roller (foam with 1 cm cuts). $10 to $15 CAD at Home Depot, RONA, or any paint store.
Prep and protection
- Drop cloths. Canvas, not plastic. Paint pools on plastic and migrates.
- Painter's tape (Frog Tape or 3M Blue) for wall edges and trim.
- Plastic sheeting for furniture you can't move out.
- Spackling, putty knife, sanding sponge for ceiling repairs.
- Wraparound eye protection. I'm serious.
The single best $30 you'll spend: A pole sander with 120-grit screens. Sanding patch repairs and old roller texture from the floor instead of from a ladder cuts your prep time in half and saves your shoulders.
For finish selection across the rest of the home, see our paint finishes explained guide.

How do you prep a ceiling before painting?
Prep is where paint failures get baked in. On a ceiling, prep is also where you decide whether the finished job looks like a pro did it. USG's drywall finishing standards call for a Level 4 or Level 5 finish under flat paint in critical lighting (USG Drywall Finishing Levels, 2024). Most Toronto homes don't have it. Your prep has to make up the difference.
Order matters. Do it like this.
- Empty the room or centre everything. Pull furniture out. What can't leave gets pushed to the middle and covered head to toe in plastic.
- Cover the floor completely. Canvas drop cloths along walls, full coverage in the middle. Paint will drip.
- Tape the wall-to-ceiling line. Run painter's tape along the top of every wall, pressed firmly.
- Inspect the ceiling. Look for water stains (need stain-blocking primer), cracks, peeling paint, nail pops, and dust or cobwebs.
- Patch and sand. Fill cracks and nail pops with spackling, let dry, sand smooth with 120-grit. Wipe dust with a tack cloth.
- Spot-prime stains. Any yellow, brown, or grey discoloration gets a stain blocker. Water and nicotine stains get Zinsser BIN shellac. Bare drywall patches get Benjamin Moore Fresh Start.
- Vacuum the ceiling. Use a brush attachment. Dust trapped under fresh paint looks like sandpaper.
A 12 by 12 ft bedroom ceiling with light prep takes 30 to 45 minutes. A water-stained, cracked ceiling in an older Toronto home can easily take 2 hours of prep before paint goes on. For the equivalent wall checklist, see our wall prep guide.
Toronto-specific warning: If your home was built before 1990 and has popcorn or stucco texture, do not scrape or sand without testing for asbestos first. Painting over intact popcorn is generally safe. Disturbing it is not. Testing costs $250 to $850 CAD and is worth every dollar. See our condo ceiling guide for the full breakdown.
What's the right paint and finish for ceilings?
Dead flat white ceiling paint, every time. Flat works because it doesn't reflect any light, so the drywall seams, roller marks, and patches underneath stay hidden. The moment you introduce any sheen (eggshell, satin, semi-gloss), side light from the windows turns every imperfection into a visible shadow. MPI's product standard for interior latex flat is MPI 53, at gloss level G1, which the institute defines as 0 to 5 units at 60 degrees (MPI Architectural Painting Manual Guide Specification, April 2022). That is the flattest tier there is, and it is the right one for a ceiling.
Benjamin Moore Waterborne Ceiling Paint (508) is what we reach for first. Three reasons it's purpose-built:
- Ultra-low spatter. The chemistry keeps droplets on the roller, not in your hair. Less mess on walls and trim during application.
- Dead-flat sheen. Zero reflectivity, which is the whole point on a horizontal surface lit from the side.
- Faster dry, better hide. It flashes off quickly so a wet edge holds across a full ceiling in one continuous session, and it masks drywall texture and patch shadows that wall paints highlight.
Here's how the common options stack up for a typical Toronto interior:
| Finish | Best Use | Why |
|---|---|---|
| BM Waterborne Ceiling 508 (flat) | Standard bedrooms, living rooms, hallways | Ultra-low spatter, dead-flat sheen, hides imperfections |
| BM Aura Bath & Spa (matte) | Bathrooms, kitchens with heavy steam | Best mildew resistance on the market, holds up over years of humidity |
| Eggshell / satin | Almost never on ceilings | Any sheen catches side light and shows every flaw |
| Semi-gloss | Trim, never ceilings | Reflects light like a mirror; will look terrible overhead |
For a deeper line-by-line on Benjamin Moore's interior lineup, see our Aura vs Regal vs Ben vs Ultra Spec breakdown.
One clarification, because this gets muddled a lot. Health Canada does publish indoor air reference levels, but they are residential air concentration limits for individual compounds, not a paint-product standard (Health Canada, Indoor Air Reference Levels for Chronic Exposure to Volatile Organic Compounds, retrieved 2026). No paint "meets" or "qualifies against" them. What you actually want on a ceiling is a low-VOC or zero-VOC product, and Benjamin Moore Waterborne Ceiling Paint 508 is Zero VOC. Bathrooms are the one place to switch products, because a bathroom ceiling is the coldest large surface in the wettest room and it grows mildew before anything else in the house does. Benjamin Moore Aura Bath & Spa in matte is what we use, including on pool-room ceilings. See our bathroom painting service and our bathroom painting guide for the full paint-and-prep system.
How do you paint a ceiling without lap marks?
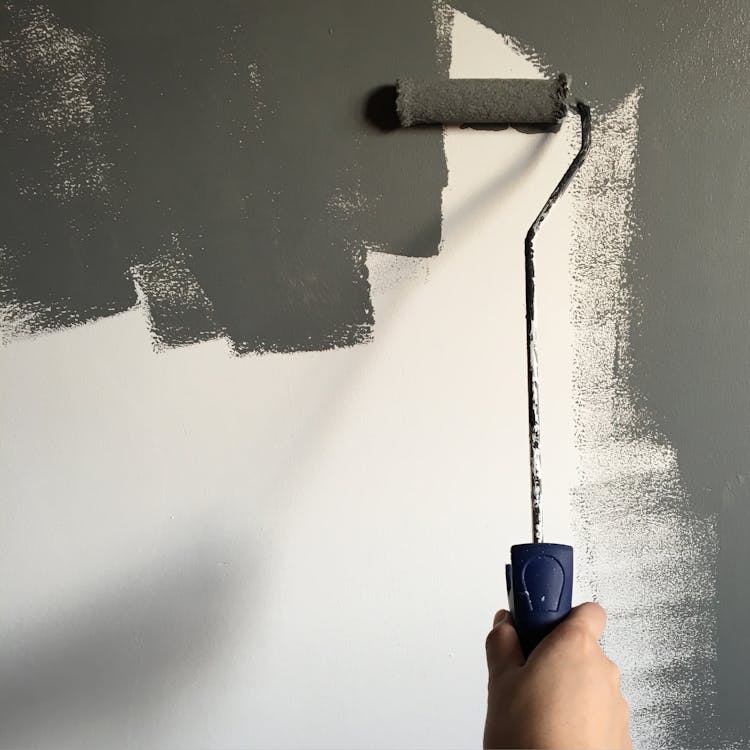
Lap marks happen when fresh paint hits dry paint instead of wet paint. The fix is method, not skill. Find your main light source, roll the first pass perpendicular to that light, then a second pass parallel to it, in 4 by 4 ft sections, always overlapping into the wet edge. Once you start, don't stop until the ceiling is done. No coffee. No phone calls. No bathroom breaks.
W-roll vs straight-line technique
Two schools of thought. Both work if you execute cleanly.
W-roll (or M-roll): Lay a loaded roller down in a rough W pattern across a 4 by 4 ft section without lifting, then fill the gaps with parallel strokes. Distributes paint quickly and avoids the heavy first-stroke streak. Good for wall paint and decent for ceilings, especially in bigger rooms where you have to spread paint fast before it tacks up.
Straight-line (parallel pass) technique: Load the roller, run parallel strokes back and forth across the section with 75% overlap, then a second pass perpendicular to the first. This is what we use on ceilings. It lays paint more evenly, keeps roller texture consistent in one direction, and puts the final stipple parallel to your main light source so it disappears.
First-time ceiling DIYer? Do straight-line. The W-roll wants you to remember a pattern while looking up with paint dripping past your nose. Straight-line is simpler under stress.
Spray vs roll decision
Roll smooth drywall, spray popcorn and stucco. That's the rule. Spraying a smooth ceiling in a furnished room means masking everything (walls, floors, light fixtures, doors) for hours just to save 20 minutes of rolling. The math only works on textured ceilings, where spraying avoids the texture-pulling problem rollers cause on raw popcorn and where a stippled spray finish looks deliberate instead of accidental. For the full method-by-method breakdown of when each tool wins, see our spray vs roll vs brush guide. For more on the popcorn-specific call (asbestos testing, removal vs paint-over), see our Toronto condo ceiling guide.
The step-by-step sequence
Step 1: Find your main light source. Usually the biggest window. Your first pass goes perpendicular (across) to that light direction, your second pass parallel. The orientation hides roller texture instead of highlighting it.
Step 2: Cut in twice, not once. Use the 2.5-inch angled brush to paint a 2 to 3 inch band along all four walls, around light fixtures, and around vents. Then do it again after the first roller coat. Cutting in once and rolling twice is what causes the picture-framing defect (see below). Cut in one wall at a time so the cut-in is still wet when your roller arrives.
Step 3: Load the roller properly. Dip the roller, roll it back and forth on the textured slope to load evenly. Fully covered, not dripping.
Step 4: Roll the first pass. Start in a corner. Roll a 4 by 4 ft section perpendicular to your main light source with parallel strokes, 75% overlap. Don't press hard. Let the nap do the work.
Step 5: Roll the second pass. Without reloading, roll the same section parallel to the light source. That evens out coverage and aligns the final roller texture with how light travels across the ceiling.
Step 6: Tip off and move on. One light stroke in the second-pass direction to finish, then reload and start the next 4 by 4 section, overlapping 4 to 6 inches into the wet edge. Don't go back over a section after you've left it.
Step 7: Wait, then second coat. Per the Benjamin Moore TDS, recoat Waterborne Ceiling Paint after 2 hours at 25C and 50% relative humidity (Benjamin Moore TDS, 2026). Then run the whole process again, no-stops rule and all. Two coats minimum. No one-coat claims on a ceiling, ever, even with self-priming labels. A flat paint with no leveling agents has nothing to hide thin spots.
The picture-framing / boxing defect
This is the one DIYers don't see until the paint dries. Picture-framing (some painters call it boxing) is a darker frame around the perimeter of the ceiling, visible from a few feet away. It shows up because the cut-in brush band got two coats while the field got one full coat over it. Two coats of paint over one coat reads darker. The frame is permanent unless you repaint the whole field.
I had one a few years ago on a Roncesvalles second-floor bedroom. Beautiful smooth ceiling, picture-framed within a year. Homeowner sent me the photo and I knew exactly what the previous painter had done before I even drove over.
The fix: cut in twice and roll twice with wet edges. First cut-in, first roll coat (roll right up into the wet cut-in band). Second cut-in once the first coat is dry, then second roll coat into that wet second cut-in. Both surfaces get two coats and they blend invisibly. It's the one technique that separates pro ceiling work from DIY ceiling work, and it costs you 10 extra minutes per room.
The "don't stop" rule is the one most DIYers break. Phone rings, coffee gets cold, kids need something. They put the roller down for 10 minutes and come back to a half-set wet edge. The lap mark from that one break will be visible from across the room for the life of the paint job. Set the phone to do-not-disturb. Use the bathroom first.
What our callback log shows: Of 60 DIY ceiling re-do calls we logged from 2023 through early 2026, lap marks were the issue in 38, stain bleed-through in 11, picture-framing in 7, and the rest were a mix of texture and wrong-finish problems. Nearly all preventable with the cut-twice/roll-twice method above.
What are the most common ceiling-painting disasters?
After two decades of fixing other people's ceiling jobs, the same five disasters come up over and over. All of them are preventable. If your ceiling is already failing, our guide on how to identify a paint blister, bubble or peel and its cause walks through telling them apart before you repaint.
- Lap marks. Already covered. Wet edge, small sections, work fast, don't stop.
- Roller flecks on the walls. The faster you roll, the more paint sprays sideways. Slow down. Switch to BM Waterborne Ceiling Paint. The low-spatter formula was built for this exact problem.
- Drips and spatter on hardwood. Canvas drops absorb. Plastic drops let paint pool. Canvas under everything.
- Stains bleeding through. Water stains, smoke, grease, nicotine. Ceiling paint alone won't cover any of them. Hit them with Zinsser BIN shellac first. Skip that step and the stain comes back in 2 to 3 weeks like nothing happened. If the stain is from an active leak, fix the source first. For the full breakdown on why a water stain keeps bleeding through ceiling paint and what actually blocks it, read our dedicated troubleshooting guide.
- Falling off the ladder. Ladder injuries sent over 22,000 Canadians to hospital in 2024 with 161 fatalities (Heightworks, 2024). Use the extension pole. Save the ladder for cutting in corners.
Hippo's 2024 homeowner survey found that 58% of DIYers spent more than planned because of project errors (Hippo Insurance, 2024). Ceilings punish overconfidence harder than most projects.

When should you just call a pro?
Even if the upfront math favoured DIY, some jobs you should hand off. Hire a pro if any of these apply:
- Ceilings over 10 feet. Scaffold or pole-and-ladder work isn't safe to learn on the job.
- Popcorn or stucco texture in a pre-1990 Toronto home. Asbestos risk. Don't scrape or sand without testing.
- Water-stained, peeling, or sagging ceilings. There's an underlying problem (leak, moisture, failed drywall) that has to be fixed first. If it's textured, see what to do with a water-stained or sagging popcorn ceiling before you touch it.
- First-time painter on a whole-home ceiling project. Too much square footage to make rookie mistakes on. Practice on a closet first.
Four out of five DIYers admit they make mistakes on home projects, and 45% say they've completely botched at least one (RubyHome DIY Statistics, 2024). Ceilings are an unforgiving first project.
We handle ceiling work as part of our interior painting services across Toronto, along with the specialty work older ceilings tend to need: drywall repair, water-damage stain blocking, and condo ceiling refresh.
Bottom line
Painting a ceiling properly comes down to four things. Prep the surface, especially stains and patches. Use real tools (extension pole, decent roller, dedicated flat ceiling paint). Work in small sections to keep a wet edge. Always do two coats with two cut-ins. Get those right and a DIY ceiling will look pro. Skip any of them and you'll either be repainting in a year or calling someone like me to fix it.
The "dangerous enough" version of ceiling-painting knowledge isn't really dangerous at all. It's just enough technique to know when to grab a roller and when to grab the phone.
Get your free 24-hour Toronto ceiling painting quote or call (416) 875-8706.
About the author
Chad Caglak is co-owner of Home Painters Pro Toronto and a 20-year working painter. He's painted everything from CityPlace condos to Leaside heritage homes and writes the craft-and-pricing content here so Toronto homeowners can decide with real numbers instead of a guess. Read more from Chad in the Toronto painter craft hub or browse the Benjamin Moore product authority cluster.
Frequently Asked Questions
A 12 by 12 ft bedroom ceiling takes a careful DIYer 2 to 3 hours: 30 minutes of prep, 20 minutes cutting in, 40 minutes for the first coat, drying time, then 40 minutes for the second coat. A pro does the same room in about an hour. Whole-home ceilings (1,200 to 1,500 sq ft) take a DIYer a full weekend; pros finish in a day.
Yes, almost always. One coat looks fine wet, then dries with patchy coverage, roller streaks, and old paint ghosting through. Two coats of dedicated flat ceiling paint give you uniform white that hides imperfections. Even paints labelled self-priming need a second coat on a ceiling, because the dead-flat sheen has no leveling agents to hide thin spots.
Benjamin Moore Waterborne Ceiling Paint (508) is our default, a flat ultra-low-spatter formula engineered to hide drywall imperfections. It runs about $50 to $60 CAD per gallon plus HST in Toronto ([Benjamin Moore](https://www.benjaminmoore.com/en-ca/paint-colours/products/interior-paints/waterborne-ceiling-paint), 2026). For bathrooms, switch to Benjamin Moore Aura Bath & Spa in matte for mildew resistance over a long, steamy life.
Keep a wet edge and do not stop until the whole ceiling is finished. Roll the first pass perpendicular to your main light source, then a second pass parallel to it, in 4 by 4 ft sections, always overlapping into the wet edge. Cut in twice and roll twice. The single biggest cause of lap marks is pausing mid-ceiling for a phone call or coffee.
Ceiling first. Always. Roller spatter and drips land on walls no matter how careful you are, and those marks paint out easily when you do the walls second. The only exception is a full spray job in an empty room where everything is masked off, but for roller work, ceilings come first every time.
Potentially, if your home was built before 1990. Popcorn texture from the 1960s through 1980s often contained asbestos, and Canada did not finalize a comprehensive asbestos ban until 2018 ([Health Canada](https://www.canada.ca/en/health-canada/services/environmental-workplace-health/contaminants/asbestos.html), 2024). Painting intact popcorn is generally fine because you are not disturbing the material. Scraping or sanding requires testing first. See our [condo ceiling guide](/blogs/paint-my-condo-ceiling-toronto/) for the full asbestos angle.
Looking up while holding a loaded roller overhead is one of the worst positions for your spine. Use a 4 to 6 ft extension pole instead of a ladder for the rolling, it lets you stand upright and use your legs and core instead of just your shoulders. Take a break every 20 minutes. Even pros end ceiling days sore; DIYers without proper technique end them limping.
Roll smooth drywall, spray popcorn and stucco. Airless spraying is faster on textured ceilings and avoids the texture-pulling problem rollers cause on raw popcorn. On smooth ceilings a 13mm roller and extension pole give you better control and zero overspray cleanup. Spraying makes sense when masking time is shorter than rolling time, which is almost never in a single furnished room.
Not on a ceiling that needs real primer. Self-priming paints can spot-cover minor patches on an already-painted surface. Bare drywall, water stains, nicotine, and big skim-coat repairs all need a dedicated primer. Use Benjamin Moore Fresh Start for new drywall or Zinsser BIN for stains. Then two coats of ceiling paint over top.
It''s a different formula, not a stripped-down version. The 508 line uses ultra-low-spatter chemistry, a dead-flat sheen with no added leveling agents, and a faster dry time so a wet edge holds across large ceilings. About $50 to $60 CAD per gallon plus HST in Toronto (Benjamin Moore, 2026). The chemistry is what you''re paying for.
Depends on your timeline. Painted popcorn locks the texture in and makes future removal 2 to 3 times more expensive. If you might want a flat ceiling in the next 5 to 10 years, remove the popcorn now (about $3 to $5 CAD per sq ft on raw texture) instead of painting over it. If you''re staying with popcorn long-term, spray oil-based or alkyd ceiling paint. Never roll latex on raw texture.
A darker frame around the ceiling perimeter caused by giving the cut-in band two coats while the field only got one. The fix is cutting in twice and rolling twice with wet edges. First cut-in, first roll, second cut-in once dry, second roll. Both surfaces get two coats and blend invisibly. See the full breakdown in the Toronto painter craft hub.
Single-room ceiling work runs $300 to $500 CAD per room plus HST in Toronto, based on our 2026 pricing. Whole-home ceilings run $1,000 to $1,500 CAD plus HST. Stucco or popcorn ceilings price at about $1.50 per sq ft, smooth flat ceilings at $0.65 per sq ft.
Yes, up to 1 cup of water per gallon, no more. Hot rooms, dry winter furnace air, and south-facing summer rooms can dry latex faster than you can hold a wet edge. A small water addition extends the open time without hurting coverage. Past 1 cup per gallon and you''ll thin the paint too much, which causes its own coverage problems. It''s also not a substitute for working fast.