


Key Takeaways
- Recurring hairline cracks are almost always house movement, not a failed patch. Buildings expand and contract with temperature and humidity, and that movement is normal (CMHC, 2025).
- A one-off crack stays fixed after patching. A crack that returns each winter is a movement joint and needs a flexible repair.
- Rigid spackle in a moving joint always re-cracks in the same line. Match the filler to the cause.
- Drywall seam cracks need mesh or paper tape plus compound. Wall-to-ceiling corner cracks need flexible filler or caulk.
- Truss uplift causes the classic corner crack that opens every winter and closes every spring.
- Two coats over real prep and primer. Paint alone will not bridge a moving crack.
- Worry about cracks wider than 3mm, diagonal cracks from door or window corners, or cracks with sticking doors.
I'm Chad Caglak. I've been painting Toronto homes for 20 years, and the question I hear more than almost any other is some version of this: "I patched that crack last year, why is it back?" The homeowner did everything right. They filled it, sanded it, painted it. And there it is again, same spot, thin as a hair, mocking them.
Here's the honest answer most people don't want to hear. The patch didn't fail. The house moved.
That distinction changes everything about how you fix it. A crack that comes back is telling you something a one-time crack never does. So before you grab the spackle for round three, here is what your wall is actually doing, and how to make the repair hold for years instead of months.
For the basics of who patches what in a rental, that's a different topic. See our Toronto tenant's guide to drywall repair. This post is about recurrence and movement.

Why do hairline cracks keep coming back after I patch them?
Recurring hairline cracks keep coming back because the surface underneath them is moving, and a rigid patch can't move with it. Buildings expand and contract with temperature and humidity through the year, and that seasonal movement is a normal part of how homes behave (CMHC, 2025). When you fill a moving joint with hard spackle, the joint keeps shifting and the patch tears along the old line.
Think of it like this. A one-off crack is a scar. Once it heals, it stays healed. A recurring crack is a hinge. It opens and closes a fraction of a millimetre with every dry winter and humid summer, and no amount of sanding changes that it's a hinge.
A recurring hairline crack is a sign of ongoing building movement, not a failed repair. Because homes expand and contract seasonally with temperature and humidity, a rigid filler placed over a moving drywall seam or framing joint splits along the same line each year. In my experience the durable fix matches the repair to the movement: flexible filler or tape-and-compound rather than hard spackle.
The whole trick is reading which kind of crack you've got. Get that right and the fix is easy. Get it wrong and you'll be patching the same line for the rest of the time you own the house.
How do I tell a one-off crack from a recurring movement crack?
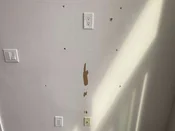
You tell them apart by timing and location. A one-off crack appears once, often after a knock, a settling nail, or a fresh patch shrinking, and it stays gone once you fix it. A recurring crack returns on a schedule, almost always over winter, and shows up in predictable spots: drywall seams, the wall-to-ceiling corner, and the corners of doors and windows. Those locations concentrate stress.
The field test I use is simple. Patch it once, properly, and mark your calendar. If it's still invisible a full year later through one Toronto winter, it was a one-off. If it reopens by February, it's a movement crack and it needs a different repair entirely.
A few patterns I look for on a callback:
A crack that follows a straight drywall seam is a taping problem. The original tape failed or was never bedded right, and the seam telegraphs through. A crack at the wall-to-ceiling corner that opens every winter is truss uplift, which I'll get to. A short crack at the top corner of a door or window is normal stress concentration, usually cosmetic. A wide diagonal crack marching out of a corner and getting worse is the one that's worth a closer look.
Here's the side-by-side I run through in my head on a callback:
| Sign | One-off settlement crack | Recurring movement crack |
|---|---|---|
| Timing | Appears once, then stays gone after a proper patch | Returns on a schedule, almost always over winter |
| Trigger | A knock, a settling nail, or a fresh patch shrinking | Seasonal expansion and contraction of the framing |
| Location | Anywhere a one-time event happened | Drywall seams, the wall-to-ceiling corner, door and window corners |
| One-year test | Still invisible a full Toronto winter later | Reopens by February in the same line |
| The fix | Patch and paint once, it holds | Flexible filler or re-tape, because rigid spackle re-cracks |
For the full surface routine before any of this gets painted, see our complete wall prep checklist.
How does Toronto's seasonal weather drive cracks?
Toronto's climate is hard on drywall joints because the seasonal swing is large. Wood framing absorbs moisture in humid summers and dries out in winter when the furnace runs, so it swells and shrinks through the year. That movement is normal building behaviour, and homes are designed to flex rather than stay perfectly rigid (CMHC, 2025). Every joint between two panels or two materials becomes a place where that movement shows up.
Winter is the worst of it. Furnace heat drops indoor humidity to desert levels, the framing lumber gives up moisture and shrinks, and joints that were tight in August pull apart in January. Then spring brings the moisture back, the wood swells, and the joints close again. That open-close cycle is the engine behind every crack that returns on a schedule.
Freeze-thaw stress adds to it, especially near exterior walls and along the top floor. The building expands and contracts as outdoor temperatures cross zero again and again through a Toronto winter. Older homes feel it more, because their framing has been cycling for decades and the original taping was often thinner than today's standard.
There's one part homeowners can actually act on. Big humidity swings make the cycle harder, so steadying indoor moisture takes some of the load off the framing. Health Canada recommends controlling indoor moisture to protect both the home and air quality (Health Canada, 2024). A winter humidifier and decent summer ventilation won't stop cracks, but they soften the seasonal punch.

What is truss uplift, and why does the wall-ceiling corner crack every winter?
Truss uplift is the most common reason a crack opens at the wall-to-ceiling corner every single winter. In a trussed roof, the top of the truss stays warm and dry while the bottom chord sits buried in cold attic insulation. In winter the top chord dries faster and arches upward, lifting the ceiling away from the interior partition walls below it. Come spring, everything settles back down.
So that corner is a hinge that swings open in January and closes by May. A rigid bead of filler in there doesn't stand a chance. It cracks every winter, you patch it every spring, and the cycle never breaks because you're fighting the wood, not the filler.
Truss uplift is a seasonal movement effect, not a structural defect. The roof truss arches upward in dry winter conditions and relaxes in spring, opening and closing the joint where the ceiling meets the interior wall. Because the gap recurs annually, a rigid patch always re-cracks. In my experience the repair that holds is a flexible filler at the junction or a floating-corner detail that lets the ceiling move freely.
The two real fixes both let the joint move. A flexible filler or a quality paintable caulk at the wall-to-ceiling line can stretch as the gap opens, so the line stays clean through the cycle. The better, more permanent answer on a renovation is a floating-corner detail, where the ceiling drywall isn't fastened tight at the very edge and is allowed to ride up and down without tearing the wall. Crown moulding fastened only to the ceiling does a similar job, hiding the movement behind trim.
What doesn't work is more spackle. I've seen homeowners patch the same Leaside ceiling corner four winters running before someone explained the joint was never going to stay still.
How do I fix a recurring crack so it stays gone?
You fix a recurring crack by matching the repair to the cause, then priming and painting properly over it. Surface prep is where most repairs are won or lost. In 20 years of callbacks I've found almost every repair that failed early traces back to skipped or rushed prep. A crack repair is just prep done with intent. Open it, fill it with the right material, then seal and coat it.
This is the sequence I run, sorted by what kind of crack you've got. Every recurring crack follows the same five steps:
- Open the crack. Rake out the loose old tape, compound, or rigid filler, and on a hairline V the crack out into a small groove so the repair has shoulders to grip.
- Fill it with the right material for the cause. A drywall seam crack gets re-taped with mesh or paper tape and bedded in joint compound in two or three thin coats, feathered wide. A wall-to-ceiling movement joint gets a bead of flexible crack filler or paintable elastomeric caulk, tooled clean, so it stretches as the corner opens.
- Sand smooth once the compound or filler has cured.
- Prime the repair with a dedicated primer over the fresh compound or filler. Skip the self-priming shortcuts.
- Repaint in two coats of finish so the line disappears and stays gone.
For a drywall seam crack, treat it like a taping job, not a filling job. Cut the loose old tape and compound out of the joint, re-tape the seam with mesh or paper tape, then bed the tape in joint compound in two or three thin coats, feathering wide. Sand smooth, prime the repair, and paint two coats. This is the only way a seam crack stays closed, because you've rebuilt the joint, not skinned over it.
For a movement joint at the wall-to-ceiling corner, go flexible. Rake out the old rigid filler, then run a bead of flexible crack filler or a paintable elastomeric caulk into the joint and tool it clean. That bead stretches as the corner opens in winter, so the line holds. Prime and paint over it once it's cured.
For exterior or stucco cracks, the same logic applies with tougher materials. Acrylic-stucco and EIFS systems are built to move, and manufacturers like DuROCK make flexible patching and finish products designed for that movement. A rigid cement patch in a flexing stucco wall cracks the same way rigid spackle does indoors.
Older Toronto homes add one more wrinkle: plaster on wood lath instead of drywall. In a century home in Leaside or the Annex, a recurring crack often isn't a drywall seam at all, it's a loose plaster key. Plaster was pushed through gaps in the lath to form keys that grip the wall, and over decades those keys break and the plaster sags away from the lath. Filling the surface crack on a section that's quietly detached just buys you a season. The real fix is to re-anchor the loose plaster back to the lath with plaster washers and screws first, then fill, prime, and paint. Skip the re-anchoring and you're patching a panel that's still working itself loose behind the surface.
A couple of rules that hold across all of them. Don't trust paint to bridge the gap, even thick or elastomeric paint only hides a very fine, stable hairline, and a moving crack telegraphs right through. And don't lean on self-priming shortcuts. Paint-and-primer-in-one products spot-cover tiny stable patches, but a real repair needs a dedicated primer over the fresh compound or filler before two coats of finish go on.
What I tell every homeowner on a crack callback: Spend the extra 20 minutes opening the crack out into a small V before you fill it. A surface smear has nothing to grip. A filled V has shoulders to hold onto, and the repair lasts years longer for almost no extra cost.
For more of the prep-and-craft thinking behind repairs like this, read our Toronto painter craft hub.
Do nail pops and corner cracks mean something is structurally wrong?
Most nail pops and fine corner cracks are cosmetic, not structural. A nail pop happens when a fastener works loose as the framing lumber dries and shrinks, pushing the nail head out until it tents the compound over it. That's ordinary seasonal movement, the same drying that opens your winter cracks, and it shows up in a huge share of normal Toronto homes (CMHC, 2025). The fix is simple: drive a screw nearby, reset the nail, patch and sand.
So when should you actually worry? The warning signs aren't subtle once you know them. A crack wider than about 3mm is past cosmetic. A diagonal crack running out of a door or window corner and getting longer or wider over time is a movement you want explained. And cracks that show up alongside sticking doors, windows that suddenly bind, or floors that feel like they slope, those together can point to settlement or a framing issue.
That's the line between a painter's job and an engineer's job. I'll patch and flexibly repair a hairline corner crack all day. But if the crack is wide, diagonal, growing, and your doors won't latch, I'll tell you to get a structural opinion before we paint over anything. Painting a structural crack just hides the evidence you'd want a pro to see.
One thing worth saying plainly. A single fine hairline crack in a Toronto home, vertical or along a seam, with no other symptoms, is almost never an emergency. Houses move. A few hairlines are the building breathing. The repair is about keeping it tidy, not about saving the structure.
When should I call a painter versus a structural pro?
Call a painter for the everyday recurring cracks: seam cracks, the winter wall-to-ceiling corner, nail pops, and fine hairlines that just need the right flexible repair and a proper repaint. These are cosmetic movement issues, and the fix is materials and technique, not engineering. A good painter re-tapes the seam, flexes the corner joint, primes, and paints two coats so the line disappears.
Call a structural pro first when the pattern says movement is beyond normal. Wide cracks, growing diagonal cracks from openings, doors and windows that have started sticking, visible sloping, or fresh cracks appearing all over at once after no obvious cause. In those cases you want the underlying issue assessed before any cosmetic repair, because painting over it loses information and solves nothing.
Here's my honest split after 20 years. The vast majority of recurring crack calls I get are cosmetic seasonal movement, and we fix them for good with the right tape, the right flexible filler, and a proper repaint. A small handful aren't, and on those I'd rather send you to the right person than collect for a patch that's hiding a real problem. Knowing which is which is most of the job.
We handle crack and seam repair as part of our drywall repair and painting service, and as part of a full interior painting project across Toronto.
Get a Toronto crack repair and painting quote
Twenty years repairing the cracks other crews keep painting over instead of fixing. Every recurring crack we touch gets the same approach: read the cause first, then re-tape the seam or flex the moving joint, prime the repair, and finish in two coats so the line stays gone through the next Toronto winter.
Get your free crack repair and painting quote or call (416) 875-8706. Quotes inside 24 hours, fixed CAD pricing, HST disclosed.
We fix recurring cracks as a standalone repair or as part of a full interior painting job. See the drywall repair painting Toronto page for the full scope.
About the author
Chad Caglak is co-owner of HomePaintersPro Toronto and a 20-year working painter. He's repaired recurring cracks in everything from CityPlace condos to century homes in Leaside and the Annex, and writes the craft-and-pricing content here so Toronto homeowners can decide with real numbers instead of a guess. Read more from Chad in the Toronto painter craft hub or the tenant's guide to drywall repair.
Frequently Asked Questions
If a crack comes back in the same spot after a proper patch, the house is moving, not the filler. A one-off crack from a settling nail or a knock stays fixed once you patch and paint it. A recurring crack reopens on a schedule, usually each winter, because seasonal expansion and contraction pull the joint apart. Buildings move with temperature and humidity, and that movement is normal ([CMHC](https://www.cmhc-schl.gc.ca/), 2025). A rigid spackle patch can not flex with it, so it splits in the same line every year.
Usually not. Nail pops happen when a fastener works loose as the wood framing dries and shrinks, pushing the nail head out and popping the drywall compound over it. That is normal seasonal movement in most Toronto homes, not a structural failure. The fix is to drive a screw an inch or two away, reset or remove the popped nail, then patch and sand. If you see dozens of pops appear suddenly, along with sticking doors or sloping floors, that is when you have it looked at structurally.
For most recurring cracks, yes. A drywall seam crack needs the joint re-taped with mesh or paper tape and bedded in joint compound, not just smeared with spackle. A movement crack at the wall-to-ceiling corner needs a flexible filler or a quality paintable caulk that can stretch as the joint opens and closes. Rigid filler in a moving joint always re-cracks. Match the repair to the cause and the crack stays gone for years instead of months.
That corner crack is the classic sign of truss uplift. In winter, the top chords of the roof trusses dry out and arch upward, lifting the ceiling away from the interior walls, then they settle back in spring. The joint at the wall-to-ceiling corner opens and closes with that cycle, so a rigid patch splits every year. The fix is a flexible filler or caulk at that junction, or a floating-corner detail that lets the ceiling move without tearing the wall.
A lone hairline crack, thin as a hair, vertical or following a drywall seam, is almost always cosmetic. Toronto homes move with the seasons and a few fine cracks are normal. Worry when a crack is wider than about 3mm, runs on a diagonal from a door or window corner, keeps widening, or comes with sticking doors and uneven floors. Those patterns can point to settlement or a framing issue and are worth a professional structural look ([CMHC](https://www.cmhc-schl.gc.ca/), 2025).
Because spackle is rigid and the joint underneath is moving. Lightweight spackle and ready-mixed filler dry hard with almost no flex. When the crack sits over a drywall seam or a movement joint, the surface keeps shifting a fraction of a millimetre with each humidity and temperature swing. The hard patch can not stretch, so it tears along the weakest line, which is the old crack. You get a clean re-crack in the exact same spot, every season.
A settlement crack is a one-time event as a house finds its footing on the soil, common in the first couple of years of a new build or after major foundation work. Once settling finishes, that crack can be patched permanently. A movement crack is ongoing and seasonal, driven by wood framing expanding and contracting with humidity and temperature all year. Settlement cracks eventually stop. Movement cracks keep cycling, which is why they need a flexible repair, not a rigid one.
Paint will not bridge a moving crack. A thick coat or an elastomeric paint can hide a very fine, stable hairline for a while, but a crack that opens and closes with the seasons telegraphs straight back through the film. Self-priming and paint-and-primer-in-one products only spot-cover tiny stable patches, they do not repair a joint. The crack has to be opened, filled with the right material for the cause, primed, then painted in two coats. Painting over it alone buys you one season at most.
Yes. Big swings between dry winter furnace air and damp summer air make wood framing shrink and swell, and that movement opens and closes drywall joints. Keeping indoor humidity steady and moderate reduces how hard the framing cycles. Health Canada advises keeping indoor moisture controlled to protect both the home and air quality ([Health Canada](https://www.canada.ca/en/health-canada/services/publications/healthy-living/addressing-moisture-mould-your-home.html), 2024). A humidifier in winter and good ventilation in summer will not stop cracks entirely, but they take the edge off the seasonal cycle.
A single recurring crack done properly, opened, re-taped or filled with the right material, primed and repainted, runs roughly $150 to $400 CAD plus HST in Toronto depending on length, ceiling height, and whether it is a seam or a movement joint. Re-taping a long ceiling seam or detailing several truss-uplift corners across a home costs more. The cheap smear-and-paint fix is what you are paying for twice, so doing it right once is usually the lower number over a few years.
It can be. A short hairline crack at a door or window corner is common, because those openings concentrate stress and the drywall is thinnest there. A diagonal crack that keeps widening from the corner, especially with sticking doors or windows that suddenly bind, is the pattern that points to settlement or framing movement. Patch a stable corner crack and watch it. If it grows or returns wider each year, get a structural opinion before you keep repainting it.