


Popcorn ceiling removal in Toronto: 2026 pricing and complete guide
Quick Answer:Popcorn ceiling removal in Toronto costs $6-$10 per square foot. A single room starts at $1,995+ (our minimum). Full main floor: $3,000-$6,000+. Whole house: $7,000-$13,000+. Price includes scraping, skim coating, sanding, priming, and two coats of ceiling paint. Asbestos testing is extra if your home was built before 1990.
I have scraped more popcorn ceilings in Toronto than I can count. Bungalows in Scarborough. Split-levels in North York. Condos downtown that were built in the 1970s and never touched since.
Every single homeowner says the same thing when we are done: "Why didn't I do this sooner?"
Here is the honest breakdown of what professional popcorn ceiling removal costs, how the process works, and what you need to know before you hire anyone.
How much does popcorn ceiling removal cost in Toronto?
Popcorn ceiling removal pricing depends on three things: the size of the area, the condition of the ceiling underneath, and whether asbestos is involved.
Here is what we charge:
Per square foot pricing
| Service Level | Cost Per Sq Ft (+ HST) | What's Included |
|---|---|---|
| Standard removal + smooth finish | $6-$8 | Scraping, skim coat, sanding, prime, two coats paint |
| Removal + knockdown or skip trowel | $7-$9 | Scraping, texture application, prime, two coats paint |
| Removal with drywall repair | $8-$10 | Includes patching damaged areas, full finishing |
| Asbestos present (abatement extra) | $10+ | Abatement by licensed contractor + standard finishing |
Per room and whole home pricing
| Project Size | Price Range (+ HST) | Timeline |
|---|---|---|
| Single room (minimum job) | $1,995+ | 1-2 days |
| Two rooms | $1,400-$2,200+ | 2-3 days |
| Three rooms | $2,100-$3,300+ | 3-4 days |
| Main floor (1,500-1,800 sq ft) | $3,000-$6,000+ | 5-7 days |
| Entire 2-storey house (1,500 sq ft per floor) | $7,000-$13,000+ | 1-3 weeks |
| Condo (700-1,000 sq ft) | $2,500-$5,000+ | 3-5 days |
All prices include scraping, skim coating, sanding, priming, and two coats of ceiling paint. Asbestos abatement is quoted separately if needed.
Multi-room projects get better per-square-foot rates because setup and cleanup happen once, not per room. If you are doing the whole main floor, it almost always makes sense to do the upstairs at the same time.
Why Toronto homes have so many popcorn ceilings
If your home was built between 1950 and 1990, there is a very good chance you are staring at popcorn ceilings right now. Toronto had a massive building boom during those decades. Popcorn texture (also called stucco ceiling or acoustic ceiling) was cheap, fast, and hid imperfect drywall work. Builders loved it.
Here is the problem: that was 40-70 years ago. What was trendy in 1975 looks tired in 2026.
Popcorn ceilings cause real issues beyond aesthetics:
- Dust magnets. The bumpy texture traps dust, cobwebs, and allergens. You cannot wipe them clean without damaging the texture.
- Dated appearance. Nothing dates a room faster than a popcorn ceiling. Potential buyers notice immediately.
- Lower home value. Toronto realtors consistently list popcorn ceilings as a negative feature. Removing them before selling is one of the easiest ways to increase your asking price.
- Poor light reflection. Textured ceilings absorb light instead of reflecting it. Smooth ceilings make rooms feel brighter and larger.
- Difficult to repair. If you get a water stain or crack in a popcorn ceiling, patching it invisibly is nearly impossible. With a smooth ceiling, drywall repair blends seamlessly.
The asbestos question: what every Toronto homeowner needs to know
This is the single most important thing I tell people: if your home was built before 1990, test for asbestos before anyone touches that ceiling.
Asbestos was commonly mixed into popcorn ceiling texture in Canada until the late 1980s. When left undisturbed, it is harmless. But the moment you start scraping, those microscopic fibres become airborne. Breathing them in causes serious health problems.
Here is what the testing process looks like:
- Sample collection. A small piece of ceiling texture is scraped into a sealed bag. We can arrange this for you.
- Lab analysis. The sample goes to a certified lab. Cost is typically $50-$150 per sample. Results take 3-5 business days.
- If asbestos is found: A licensed abatement contractor removes the material following Ontario regulations. This adds $3-$8 per square foot to the project cost, depending on the extent.
- If no asbestos: We proceed with standard removal.
Do not skip this step. I have seen homeowners try to save money by scraping first and testing later. That is backwards and dangerous. The test is cheap. The health risk is not worth it.
Our popcorn ceiling removal process
After 20 years, we have this dialled in. Here is exactly how a project goes from start to finish.
Step 1: Protection and prep
We take protection seriously. Everything in the room gets covered or moved out. Heavy-duty drop cloths go on the floors. Plastic sheeting is taped to the walls. Light fixtures come down. We seal off doorways with plastic to keep dust out of the rest of your home.
This setup takes time, but it is the difference between a clean job and a disaster.
Step 2: Wetting the ceiling
We mist the popcorn texture with water and let it soak in for 10-15 minutes. This softens the material so it scrapes off cleanly without gouging the drywall underneath. Some ceilings have been painted over multiple times, which makes this step harder. Painted popcorn takes longer to wet and requires more passes.
Step 3: Scraping
Using wide drywall knives, we scrape the softened texture off in sections. This is the messy part. Wet texture drops to the covered floor below. A skilled crew works methodically across the ceiling, section by section.
This is where experience matters. Push too hard and you gouge the drywall. Too soft and you leave texture behind. Our crews have done thousands of ceilings and know exactly how much pressure to apply.
Step 4: Skim coating
Once the texture is off, the drywall underneath is rarely smooth enough to paint directly. There are ridges, seams, small gouges, and imperfections. We apply a thin skim coat of joint compound over the entire ceiling to create a uniform surface.
For ceilings with more significant damage — cracks, water stains, holes — we do full drywall repair before skim coating.
Step 5: Sanding
After the skim coat dries, we sand the entire ceiling smooth. This is dusty work, which is why our prep and containment in Step 1 is so important. We use fine-grit sandpaper and check the surface with a work light to catch any imperfections.
Step 6: Priming and painting
We apply a high-quality primer to seal the new surface, then finish with two coats of ceiling paint. Most clients go with flat white, which gives the cleanest, most modern look. But we can match any colour you want.
When we leave, your ceiling is completely finished. No follow-up visits needed.
Finish options after popcorn removal
You have choices beyond just "smooth." Here are the three finishes we offer:
Smooth finish (most popular)
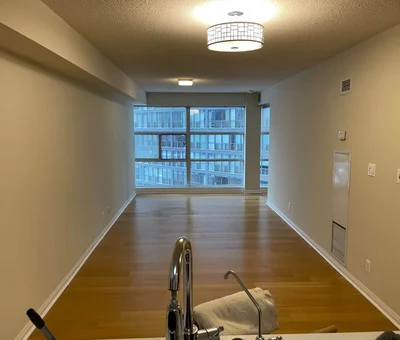
Clean, flat, modern. This is what about 85% of our Toronto clients choose. It reflects light beautifully and gives your home a contemporary feel. Smooth finish requires the most skill to get right because every imperfection shows.
Knockdown texture
A subtle, mottled texture created by spraying joint compound and then flattening the peaks with a wide knife. It hides minor imperfections better than smooth and adds visual interest without looking dated. Popular in newer Toronto homes.
Skip trowel texture
A hand-applied Mediterranean-style finish with an organic, stucco-like appearance. Less common in Toronto but a good option if you want character and warmth. Each ceiling is unique because the pattern depends on the hand of the person applying it.
Not sure which finish is right? We bring samples and can apply test patches so you see exactly what each looks like in your space before we commit.
DIY vs. professional popcorn ceiling removal
I understand the temptation. You watch a YouTube video, it looks straightforward, and you think you will save a few thousand dollars.
Here is the reality:
| Factor | DIY | Professional |
|---|---|---|
| Cost | $200-$500 in materials | $1,995+ for single room |
| Time | 2-4 days per room (weekends) | 1-2 days per room |
| Quality | Uneven, visible seams, roller marks | Smooth, paint-ready, uniform |
| Asbestos risk | High if untested | Tested and managed properly |
| Mess | Extreme — gets everywhere | Contained with professional setup |
| Drywall damage | Very likely for first-timers | Minimal with experienced crew |
| Equipment needed | Scaffolding, sprayer, sanders, knives | We bring everything |
| Final result | Often needs professional repair | Move-in ready |
The honest truth: most DIY popcorn removal jobs I have seen end with the homeowner calling a professional anyway. Either they damage the drywall, cannot get the skim coat smooth, or realize how physically brutal it is to work overhead for hours.
If you have one small room and plenty of patience, DIY can work. For anything bigger, hire a professional popcorn ceiling removal company and save yourself the frustration.
What to expect during the project
Popcorn ceiling removal is not quiet, clean work. Here is what to plan for:
- Noise. Scraping and sanding generate noise. Not as loud as demolition, but noticeable throughout your home.
- Dust. Despite our containment, some fine dust will travel. We recommend covering electronics and removing small valuables from adjacent rooms.
- Access. We need full access to the rooms being worked on. Furniture should be moved out or to the centre of the room (we can help with this).
- Drying time. Skim coat needs 24 hours to dry between coats. This is the main reason projects take multiple days.
- Living in the home. You can stay in your home during the project. We contain the work area and clean up at the end of each day.
Toronto condos and popcorn ceilings
A huge portion of our popcorn ceiling removal work comes from condo owners. Toronto condos built in the 1960s through 1980s almost always have popcorn ceilings. If you are updating a condo before selling or just modernizing your space, removing popcorn texture is one of the highest-impact changes you can make.
A few things specific to condo projects:
- Building rules. Most condos require you to submit a work permit and carry insurance. We handle the paperwork.
- Noise restrictions. Condos typically allow work Monday to Friday, 9 AM to 5 PM. We work within your building's rules.
- Elevator booking. We coordinate material delivery and debris removal around elevator schedules.
- Smaller spaces, bigger impact. Even a 700 sq ft condo looks dramatically different with smooth ceilings. Check out our guide on condo painting costs in Toronto if you are planning a full refresh.
Service areas
We provide professional popcorn ceiling removal across the Greater Toronto Area, including Toronto, North York, Scarborough, Etobicoke, East York, York, Mississauga, Brampton, Vaughan, Richmond Hill, Markham, Pickering, Ajax, and Oakville.
Whether your home is a 1960s bungalow in Scarborough or a 1980s townhouse in Mississauga, we have seen and removed every type of popcorn ceiling texture out there.
Why homeowners choose us for popcorn ceiling removal
- 20+ years experience removing popcorn ceilings across the GTA
- Asbestos testing arranged — we coordinate everything so you do not have to
- Full finishing included — scraping, skim coat, sanding, priming, and painting
- Clean worksite — professional containment and daily cleanup
- Free detailed quotes within 24 hours
- 5-year workmanship warranty on all ceiling finishing
We are not a general contractor who does a bit of everything. We are professional painters who specialize in interior work, and popcorn ceiling removal is one of the jobs we do most. For a detailed look at interior painting pricing, check out our interior painting cost guide.
Get a free popcorn ceiling removal quote
Ready to get rid of those popcorn ceilings? Tell us about your project and we will send you a detailed quote within 24 hours. No pressure, no obligation.
Call me directly at (416) 875-8706 or request your free quote. If I don't answer right away, I'll get back to you as soon as I can.
Frequently Asked Questions
Popcorn ceiling removal in Toronto costs $6-$10 per square foot, depending on ceiling condition, finish choice, and whether asbestos is present. A single room starts at $1,995+ (our minimum job size). Two or more rooms run $700-$1,100+ per room. A full main floor (1,500-1,800 sq ft) costs $3,000-$6,000+, and an entire two-storey house runs $7,000-$13,000+. All prices include scraping, skim coating, sanding, priming, and painting.
If your Toronto home was built before 1990, there is a real chance your popcorn ceiling contains asbestos. The only way to know for sure is to have a sample tested by a certified lab. We can arrange asbestos testing for you, which typically costs $50-$150 per sample and takes 3-5 business days. If asbestos is found, a licensed abatement contractor must remove the material before we can proceed with finishing. Never scrape a popcorn ceiling yourself without testing first.
A single room takes 1-2 days. Two to three rooms take 2-4 days. A full main floor (1,500-1,800 sq ft) takes 5-7 days. An entire house takes 1-3 weeks depending on size and ceiling condition. These timelines include scraping, skim coating, sanding, priming, and two coats of paint. Ceilings with multiple layers of paint or heavy damage may take longer.
You can, but most homeowners regret it. DIY popcorn ceiling removal is extremely messy, physically exhausting (you are working overhead the entire time), and risky if you gouge the drywall or miss asbestos. A professional crew with proper tools and experience will finish in a fraction of the time and deliver a smooth, paint-ready surface. The cost difference between a botched DIY job that needs professional repair and hiring us from the start is usually zero or negative.
We offer three main finish options. Smooth finish is the most popular, giving you a clean, modern ceiling. Knockdown texture adds a subtle, mottled texture that hides minor imperfections. Skip trowel is a hand-applied Mediterranean-style texture. About 85% of our Toronto clients choose smooth finish. We will help you pick the right option based on your home style, ceiling condition, and budget.
Yes, painting is always included in our popcorn ceiling removal service. After skim coating and sanding, we apply a high-quality primer to seal the new surface, followed by two coats of ceiling paint. Most clients choose a flat white finish, but we can match any colour you prefer. The ceiling is move-in ready when we leave.
Popcorn ceiling removal is inherently messy, but we take serious precautions. We cover all floors with heavy drop cloths, tape plastic sheeting to walls, seal doorways to contain dust, and remove or cover furniture. After scraping, we clean up all debris before starting the finishing work. Your home will be clean when we leave. We recommend removing small valuables and electronics from the room beforehand.
Absolutely. Popcorn ceilings are one of the biggest turn-offs for Toronto home buyers. Removing them can increase your home value by $2,000-$10,000+ depending on the size of the project. Beyond resale, you get brighter rooms (smooth ceilings reflect light better), easier cleaning (no more dust traps), and a modern look that transforms the entire feel of your home. It is one of the highest-ROI renovations you can do.